A Circuit Map Is Not a Lap: The Myth of the Track as a Single Sequence
A circuit map hides how sections connect. Learn to read transitions, rhythm, and linked corners to understand where a lap gains its character.
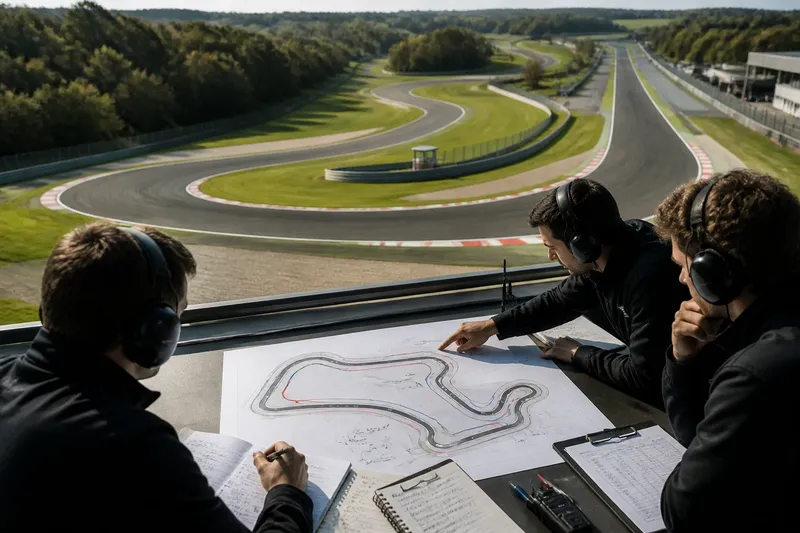
The common mistake in reading a circuit map is treating each corner as a separate problem. That turns a lap into a shopping list of braking points and apexes, and it misses the transitions that determine whether the car arrives at the next section settled, loaded, or already compromised. A circuit map is useful; a lap is a continuous negotiation.
Consider an invented endurance circuit called Greybank Park. Its map shows a long right-hander, a short straight, a left-right pair, and a fast bend leading onto the main straight. Say a fictional team is preparing a car there from the drawing alone. If its notes describe each turn in isolation, they may be accurate in a narrow sense and still fail to explain why the lap feels awkward. The useful unit is not always the corner. Often it is the stretch of track connecting several corners.
Read the links
At Greybank, the long right-hander feeds a short straight that is too brief to reset the car completely. The next left turn arrives while the driver is still unwinding steering and the suspension is still responding to the previous load. On a map, those are separate shapes. In motion, the first corner sets the conditions for the second.
This is why corner labels such as “slow,” “medium,” and “fast” can be misleading when used alone. They describe an individual bend, but not the demand of arriving there after a particular exit. A modest corner can become consequential if it follows a section that leaves little time to brake, change direction, or place the car.
A useful map-reading habit is to trace the route with a finger, but pause at the places where the car must change state: braking to turning, turning to acceleration, one direction to another, or a loaded bend to a straight. Those transitions are where the lap’s grammar appears. The circuit stops looking like a row of corners and starts looking like a sequence of demands with dependencies.
Greybank’s middle sector
Imagine the fictional team begins with a simple plan: brake late for Greybank’s long right, prioritize its apex, then attack the left-right pair. The plan sounds plausible until the driver’s notes reveal that the short straight leaves little opportunity to place the car for the first left. A late exit from the right-hander carries extra steering correction into the direction change.
The team does not need a dramatic setup change to learn from that observation. It redraws the middle sector as one linked passage and asks a different question: where should the car be positioned before the direction change, and what compromise in the preceding corner makes that position possible? The answer is to accept a less aggressive entry to the long right and leave the car straighter on exit. That gives the driver a cleaner approach to the left-right pair.
The visible result in this invented situation is not a magic new line or a claim that every corner is now faster. The driver reports fewer corrections through the pair and can describe the intended path more consistently. The team has improved its understanding of the sector by changing the relationship between corners, not by treating each apex as a prize to collect.
Transitions shape rhythm
Rhythm is not simply a driver’s preferred pace. It is the pattern of attention and control a circuit demands: how often the driver must brake, release, turn, change direction, and commit to acceleration. A lap with several linked direction changes can feel busy even if none of its corners is especially severe. A long, open bend can feel calm until its exit dictates the placement for a technical section that follows.
At Greybank, the fast bend before the main straight gives the lap its most obvious visual moment. But its character depends on the left-right pair before it. If the car exits that pair poorly positioned, the driver may have to delay commitment through the fast bend. The bend’s reputation as a standalone challenge does not explain the practical issue: the approach has already spent or preserved the room needed to use it.
For endurance racing, this linked view also helps a team communicate across a long event. A driver’s note such as “the second left is difficult” is less useful than a description of what arrives there: a lingering steering load, a curb that narrows the preferred line, or a short approach that leaves little time to settle the car. The more precisely a note describes the transition, the easier it is for another driver to interpret.
What map marks miss
A circuit diagram usually shows route, direction, and major corners. It may not communicate camber, surface changes, curb shape, sightlines, or how much track is available at the exit. Even a detailed map cannot fully show how one section feels after another. Those omissions do not make maps useless; they define what a map can answer.
At Greybank, the fast bend’s outline appears generous. In the invented walk-through, the team later notices that the usable exit narrows sooner than the drawing suggests. That makes the preceding left-right pair more important: the driver needs to arrive at the fast bend with the car already placed, rather than correcting position at the last moment. The map provided the route; observation supplied the missing context.
Track walk notes, onboard footage, and a circuit map serve different purposes. A track walk can reveal surface texture and sightlines. Onboard footage shows the sequence from the cockpit, though camera position and lens distortion can disguise distance. A map helps organize the whole circuit. None should be asked to stand in for the others.
Questions about circuit reading?
Why are linked corners harder to read?
Because the best approach to one corner may depend on the exit from the corner before it. A driver is managing the next placement while still completing the current turn.
Should the fastest line always target each apex?
No single apex choice makes sense without the following section. A slightly different entry or exit may leave the car better positioned for the next demand, especially when the track changes direction quickly.
What should a driver note after a session?
Record what made a section difficult and what preceded it: a compromised exit, a delayed direction change, a surface seam, or limited sightline. That gives the next driver a usable cause-and-effect description rather than a verdict on one corner.
Can a map predict a circuit’s rhythm?
It can suggest where transitions occur, but it cannot fully convey their timing or feel. Use the drawing to frame questions, then check those questions against onboard views, track observations, and driver feedback.
What is not worth chasing
It is not worth assigning elaborate nicknames to every bend or arguing over whether a section is “flowing” before anyone has described what the car actually does there. Such language can be handy shorthand once a group shares its meaning. Before that, it is decoration with a radio channel.
In the Greybank example, the useful change came from describing how the long right affected the left-right pair, then revising the approach to preserve a cleaner transition. That is the central lesson in reading a circuit map: look for what each section hands to the next. The track’s character lives not only in its corners, but in the condition, position, and rhythm carried between them.
When studying a circuit map, trace those connections before memorizing corner names. It gives the driver and team a more complete picture of the lap, and a better set of questions to take onto the circuit.